Tuesday, September 27, 2011

Grilled Pineapple

We absolutely love to be outside cooking on the grill during the Fall time. This Summer our missionary friends came back from overseas to visit family and friends. We had the privilege to spend a lot of quality time with them, along with other local friends of ours.

One day we were grilling out burgers, brats and veggies after church. Our friends who are from overseas wanted to show us how to make a ''Brazilian Grilled Pineapple'' for dessert. I was so skeptical about eating a grilled pineapple, just seemed so weird to me? I was totally shocked, it was so simple and flavorful, and now a favorite item to cook on the grill.


Preparation:


CINNAMON.. FRESH OR MCCORMICK!


 Florida's Natural Cane Sugar. 

Medium heated grill. Serving Plates and Hungry Belly's.


1. Cut the skin off around the pineapple. Don't cut the stalk off.

2. Combine Cane Sugar and Cinnamon into shallow mixing bowl.


3. Rotate pineapple and coat thoroughly.  

4. On a medium heated grill, place your pinapple on the grill and rotate on each side for 2-3 minutes until some grill marks appear. 


5. Take off grill and cut off a inch all the way around and continue to repeat steps 2 & 3. It will even cook through the core. 

The whole process can take up to an hour, but it's a great time to enjoy your company outside in the beautiful Fall weather or anytime of the year!


Happy Grilling!

Wednesday, September 21, 2011

Pumpkin Cake Pops

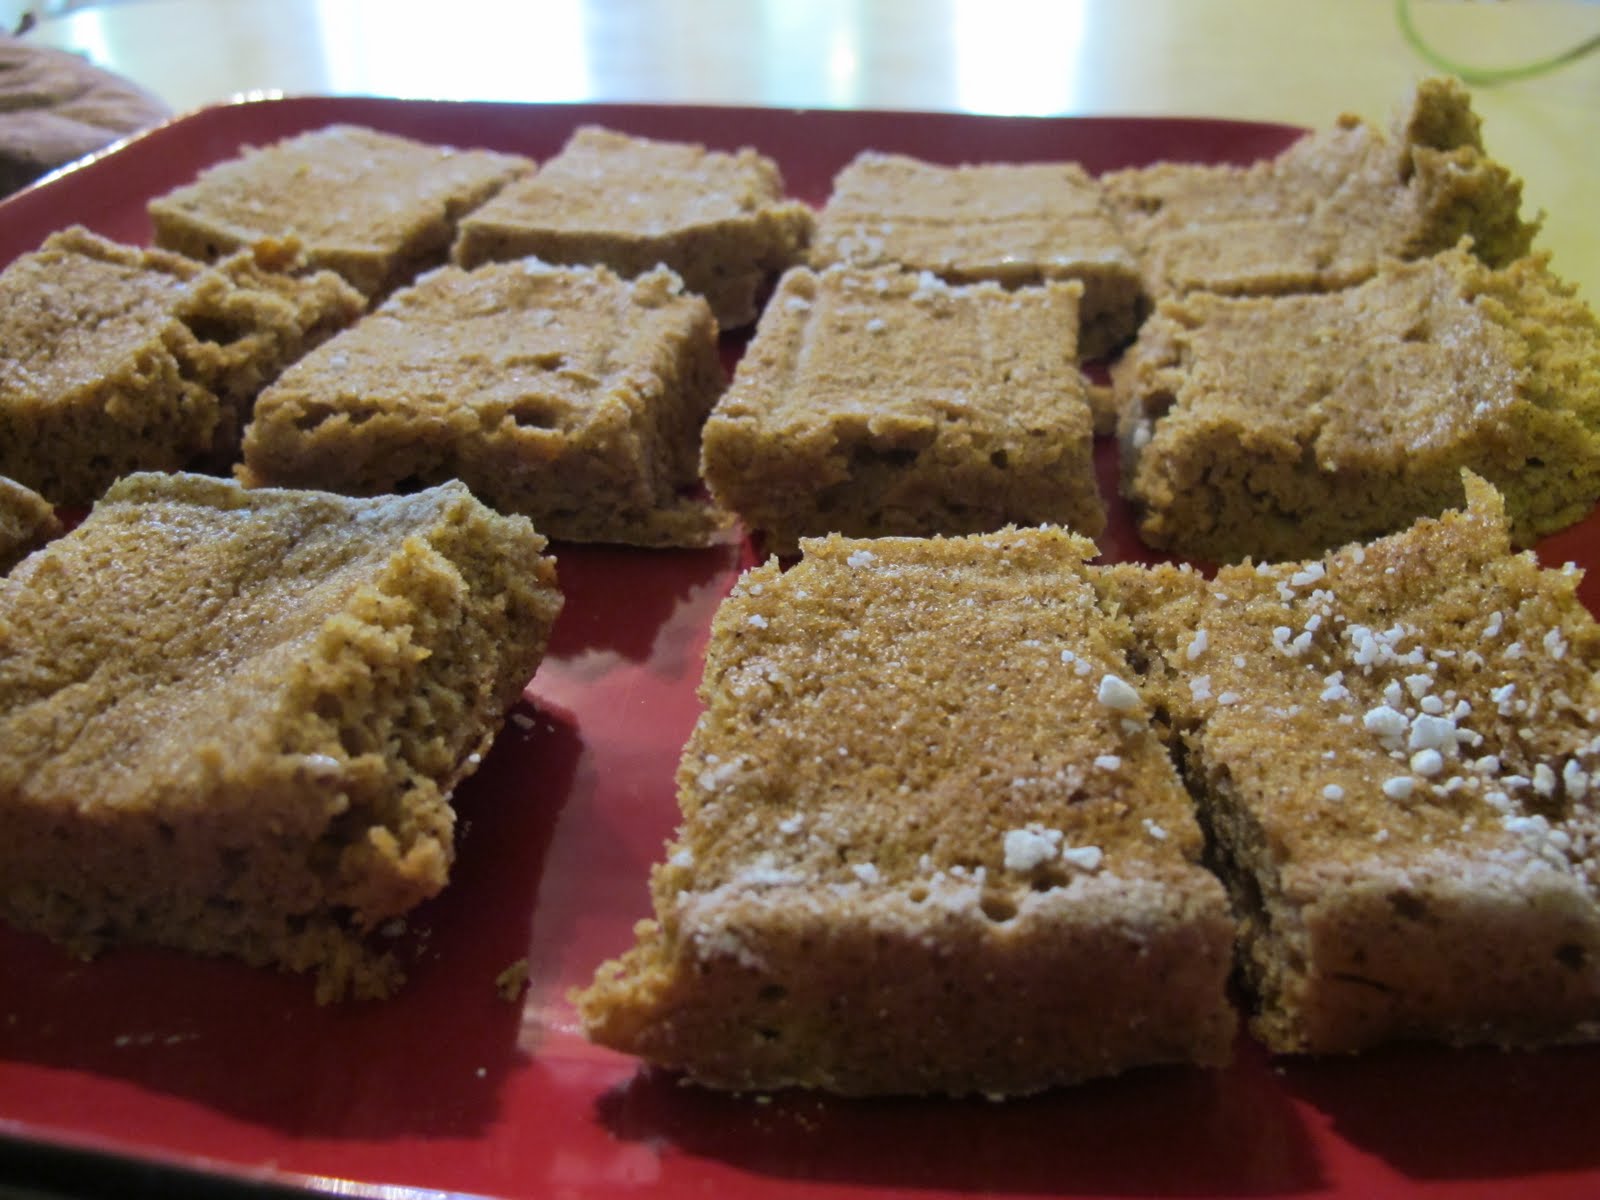
Might not be the best picture, but they are GREAT!


 Two weeks ago I made Pumpkin Cakes (Previous Post). I had some leftover cake and I was going to use it to make Pumpkin croutons, instead I made Chocolate Covered Pumpkin Cake Pops!!!

I didn't know what I was really getting myself into by making these. I tried to make other cake pops, lets just say, actually I will not say anything at all!!! But let me re-assure you that these Pumpkin Pops are delicious,  even my husband loved them, he isn't much of a sweets eater!


CAKE INGREDIENTS:


1/4 Cup Powdered Sugar
3/4 Cup All Purpose Flour
1/2 Tsp Baking Powder
1/2 Tsp Baking Soda
1/2 Tsp Ground Cinnamon
1/2 Tsp Pumpkin Spice
1/4 Tsp Salt
3 Large Eggs
1 Cup Grounded Sugar
2/3 Cup Pure Pumpkin (Libby's)
1 (8oz) Cream Cheese
1 Cup Powdered Sugar
1 Tsp Vanilla
Chocolate for melting 
(Use what you prefer. I used Chocolate Bark.) 
Lollipop Sticks 
(buy at any local craft store.)
Cup or deep bowl filled with rice or beans 
(To hold your cakepops up!)
Lollipop Plastic Wrappers
Waxpaper

 Directions: 

1.
Pre-Heat your oven to 375 degrees

2.
Grease a 15x10 cake pan, line with wax paper, grease and flour paper.

3.
 In a Medium size mixing bowl, Combine flour, baking powder, baking soda, cinnamon, pumpkin spice, salt and set aside.

4.
Beat Eggs and Sugar in mixer until thick. Then beat in the pumpkin, followed by the flour mixture till well mixed. 


5. 
Pour evenly into your greased pan and bake for 13-15 minutes. (To know it is done, press finger into cake, if it springs back you are good to go!)


6.
Take your cake and let it cool either in the fridge or freezer. I placed my cake in the freezer for about 20 minutes. 

7.
When your cake is chilled then crumble your cake batter into a bowl.

No, that isn't pumpkin, it's funfetti. But that's what it is supposed to look like!

 8.
After your cake is crumbled well. Fold in 8 ounces of Cream Cheese.

 9.
You will then, make small cake balls and put them on a wax paper lined tray. Put them in the freezer for about 15-20 minutes, again, you don't want them completely frozen. In the meantime go ahead and melt your chocolate, of course a little taste test doesn't hurt!

10. 
After 20 minutes, pull your cake balls out. Dip the end of the stick into the chocolate, then GENTLY stick into cake ball (1'') and dip (Don't swirl around, otherwise you will have cake all in your chocolate.) into chocolate. Stick into your designated cup/bowl and continue to repeat steps.


SN: I woke up to breakfast and 7 gorgeous sunflowers last week, my husband said: ''Happy 7 months honey''! So thoughtful :)

11.
Place your Cake Pops in the fridge till chocolate is completely harden. Then put your Cake Pops in plastic lollipop wrappers and enjoy with family and friends!  
(Or just leave in your cup/bowl and serve them as dessert after dinner or a party!)


Happy Baking <3

Tuesday, September 13, 2011

Pumpkin Cake Recipe


Taken last Fall at our favorite park: Woodward!


Fall, I have no patience to wait till Oct 1st to start celebrating these two glorious months! Pumpkin candles are burning, Fall decor is starting to make its appearance and the weather is starting to change, slowly. 

I had the urge to attempt to make a Pumpkin Spice Cream Cheese roll, I'm going to be honest, it failed. But when something goes wrong the best thing to do is IMPROVISE! That's exactly what I did :) 


So, I rolled out my cake, stared at it in disappointment as the cake cracked slowly down the middle. But quickly got over it and made them into mini cakes. I was thrilled how well they turned out!! Don't let one thing ruin the dish, be creative and just fix the problem! 


Ingredients:

1/4 Cup Powdered Sugar
3/4 Cup All Purpose Flour
1/2 Tsp Baking Powder
1/2 Tsp Baking Soda
1/2 Tsp Ground Cinnamon
1/2 Tsp Pumpkin Spice
1/4 Tsp Salt
3 Large Eggs
1 Cup Grounded Sugar
2/3 Cup Pure Pumpkin (Libby's)
1 (8oz) Cream Cheese
1 Cup Powdered Sugar
1 Tsp Vanilla


 Directions: 

1.
Pre-Heat your oven to 375 degrees

2.
Grease a 15x10 cake pan, line with wax paper, grease and flour paper.

3.
 In a Medium size mixing bowl, Combine flour, baking powder, baking soda, cinnamon, pumpkin spice, salt and set aside.

4.
Beat Eggs and Sugar in mixer until thick. Then beat in the pumpkin, followed by the flour mixture till well mixed. 


5. 
Pour evenly into your greased pan and bake for 13-15 minutes. (To know it is done, press finger into cake, if it springs back you are good to go!)

6. 
Let cake cool, then flip cake out onto a serving tray, clean counter or cutting board.


7.
Cut your pieces into squares, however big or small you want them? 


Cream Cheese Mixture:

Beat Cream Cheese, Vanilla, Powdered sugar, butter until smooth. 


8.
Place your cream cheese mixture in between layers and refrigerate. 

9.
Before serving, sprinkle a little powdered over the top of the cakes and ENJOY!


By all these lovely tokens September days are here, With summer's best of weather And autumn's best of cheer. - Helen Hunt Jackson


Saturday, September 10, 2011

Onion Strings


It's Great To Be A Florida Gator!


2009 Fl vs GA game!


This Week is a Kick off SIDE!

The most common concession stand buy or party meal is an All American favorite, Hamburgers and Hotdogs. This week I am substituting the fries for some favorable and crispy:


SHOE STRINGS! 


INGREDIENTS:

1 Large Sweet Onion 
2 cups of Buttermilk (If you don't have buttermilk, scroll down for the recipe)
2 Cups of All Purpose Flour
Canola Oil for frying
Cayenne Pepper, Salt & Pepper to season
Buttermilk Substitute:

1tbsp of distilled white vinegar 
1 cup of  milk 

mix those ingredients together and you have buttermilk! Crazy eh?


DIRECTIONS:

1.
Begin Mix All Purpose flower, Cayenne Pepper (or be creative and find a spice you like!), Salt & Pepper into a large mixing bowl and set aside.

2.
Peel then cut your onion(s) VERY thinly!


3.

Put your onions into a Med/Large mixing bowl and then pour your buttermilk over them. Let the onions soak for about 30 minutes. 

4.

Find a pot to pour 1-3 cups of canola oil in. (We used our large skillet to cook ours in)
Approx heat should be between 350 - 375 degrees. If you don't know how hot it is, just sprinkle a pinch of flour over the hot oil and if it sizzles you are ready to rock and roll!


5. 

Using your tongs, take some of your onions and dip them into your flour mixture, coat them well and sake them off a little. Then Place them into your oil. Then take a spoon or fiddle and try to break some of them apart. After about a minute of sizzling they should be Golden Brown! Place on a paper towel, and continue to do step 4 & 5 until all your onions are cooked. Serve on the side or top them on your juicy burger, ENJOY!


 SEE YOU NEXT SATURDAY!


Monday, September 5, 2011

Labor Day Brunch


Traditionally, Labor Day is celebrated by most Americans as the symbolic end of the summer. In high society, Labor Day is (or was) considered the last day of the year when it is fashionable for women to wear white.

 
 Myself, I never wear white. Within 10 minutes I probably, most likely would look like this...


Tom was snuggled up under the blankets this morning, playing on his phone, enjoying the beautiful breeze coming through the windows. I got up a little earlier to surprise him with Brunch-fast!

Saturday we made Bacon wrapped Jalapeno poppers, I had a carton full of the cream cheese mixture leftover, so I decided I would re-use it this morning. I decided to make a open faced, bacon, egg sandwich, with a side of fresh strawberries and homemade fruit dip.. can't forget the Iced Chai Tea !!!


 SN: My favorite places to buy mugs from is Anthropologie!


Ingredients: 

2 Slices of Everything Bread (You can find this in the bakery section at Wal-Mart, seriously the best bread!)
3 Eggs
1 clove garlic, finely minced
1/3 Cup Tomatoes, diced
Cream Cheese (Want the cream cheese recipe that I used today? Go to Love & Football post)
Salt & Pepper to season 
4 slices of bacon (I used Turkey bacon today.)


Directions:

1.

Scramble your eggs and add your minced garlic.


2.

Cook your bacon till well done. while you are doing that go ahead and heat up your panini (if you don't have a panini, just use your toaster/toaster oven) and place on there till your bread is slightly golden brown. 
3. 

Take your cream cheese and spread it on top of your bread. Then add your scramble eggs and top it with bacon & your freshly diced tomatoes. Season with Salt & Pepper.


Tom could smell everything cooking, so my ''Surprise'' brunch-fast turned into him helping me.


Easiest Fruit Dip:
 serves: 2

12 Strawberries sliced
(or Sour Cream)
3-4 tbsp brown sugar


Mix Greek yogurt and brown sugar together well. Then serve with fresh fruits! 


Wisco starring at us from outside! Don't mind the jungle scenery!


 so yummy!


 The best colors, Orange & Blue!


 Wisco, digging holes.


 I love this little guy so much!


Have a wonderful Labor day, filled with Love & Laughter!


Sunday, September 4, 2011

Hot Artichoke Dip


There is nothing like dish of Hot Artichoke Dip to start off the Fall season.

This afternoon we enjoyed time with one of my husband's former co-workers and family. His mother asked me to make artichoke dip, I was more than happy to do so. 

One of my favorite people I follow, Ree Drummond has a scrumptious recipe for Hot Artichoke Dip. I mean, why go spend $10 on dip at a restaurant, when you can buy all the ingredients at the store for the same cost and feed 5-10 people.


 INGREDIENTS:  

two 14oz cans artichoke hearts, drained


 (SN:I'm addicted to Caladrea Lotions & Soaps!Definitely a staple in this house!!!)


8 oz block of cream cheese (I use the 8oz container, because you save .45!)
1 cup of real mayo (see last blog for homemade mayo.)
Cayenne Pepper
2 green onions, chopped
1 cup of grated Parmesan cheese
Dash of salt
Freshly ground black pepper 


Preheat your oven to 350 degrees


DIRECTIONS: 

1.
Add 1 can o the artichokes, cream cheese, and the mayo to your mixing bowl (Kitchenaid or Food Processor)


2.
Sprinkle in cayenne pepper to taste (I like to sprinkle a little extree). Add the green onions to the bowl as well. 

3.
Pulse the mixture 5-7 times. You don't want to liquefy it, just get the artichokes all chopped up and mixed with the other ingredients. 
Mix the Parmesan and salt & pepper to taste, then set aside.


 4.

Now roughly chop up the remainder artichokes, add to the bowl and gently mix together. 


 (SN: I highly recommend The Pioneer Woman Cooks, cookbook. check out the side of my blog for super deals from Amazon.)


5.

 Place your dip into a oven safe dish and bake for Approx 20 minutes


LAST STEP:

Take out of the oven, serve with veggies, chips, crackers and breads!


Saturday, September 3, 2011

Grilled Jalapenos wrapped in bacon


It's my FAVORITE time of the year! 
College Football, Fall is in the air, Tailgating, Parties and wearing my favorite colors BLUE & ORANGE!!!!
This is also the time of the year where I am the most home sick, because I am missing out on going to the FLORIDA games and all the festivities!!!  


 This year I decided to make football season fun, not only just for me, but also trying to entice my husband with some wonderful savory, scrumptious, finger licking good food! 


Well before we get started on tonights treat, I am not sure if my husband knew what he really was signing up for when he started dating me. I mean, he knew I was a Gator fan but didn't know that I would have the laptop on with 4 games playing (Thanks ESPN!) and T.V. going at the same time. But as a friend said tonight in her FB Status: ''In marriage it is about compromise.... but there is just no compromising about football. Go Gators!!!''
SO TRUE, OH SO TRUE!  


Tonight, what better appetizer to have than some zesty jalapeno poppers! My husband loves spicy foods, he always has the bottle of Siracha aka Rooster Sauce at the table. I got creative and decided to make my own cream cheese mixture. I really hope you enjoy this recipe as much as we did!
  
Kick Off Poppers!
 (Grilled Bacon wrapped Jalapeno's filled with Cream Cheese)

6 Jalapenos (Halved & De-Seeded)
12 Slices of Bacon (We used Turkey Bacon)
  8 oz package of Cream Cheese (We had leftover Cream Cheese, so we put it back in the container to save for later use.)
1/4 Cup Shredded Sharp Cheddar Cheese
1 stalk Green Scallion finely diced
1/4 Red Pepper finely diced
Cilantro to season 
Salt & Pepper to season


1. Slice Jalapeno's in half, De-Seed, rinse well with cold water, pat dry. 
FYI: The seeds of the Jalapeno's contains oils that are VERY HOT!!!

2. Mix Cream Cheese, Cheddar Cheese, Scallion, Red Pepper, Cilantro, Salt & Pepper in a mixer until mixture is softened. 


3. Take mixture and spoon into Jalapeno halves.

 Stay Classy in your game day attire!!!!


4. Wrap bacon around the Jalapeno's and secure with toothpick.

 5. Place Jalapeno's on a medium temperature grill. Cook until poppers are tender and bacon is well cooked. (Cooking times will vary. Alternate: You can also bake in a pre-heated oven at 350 degrees until bacon is brown and CRISPY. Approx 15-20 minutes.)


 As you can see we cooked up some Johnsonville Brats!

5. Take your HOT Jalapeno's off the grill and place them on your serving tray or plate and ENJOY! 


CHECK BACK EVERY FRIDAY FOR THE NEXT GAME DAY TREAT!